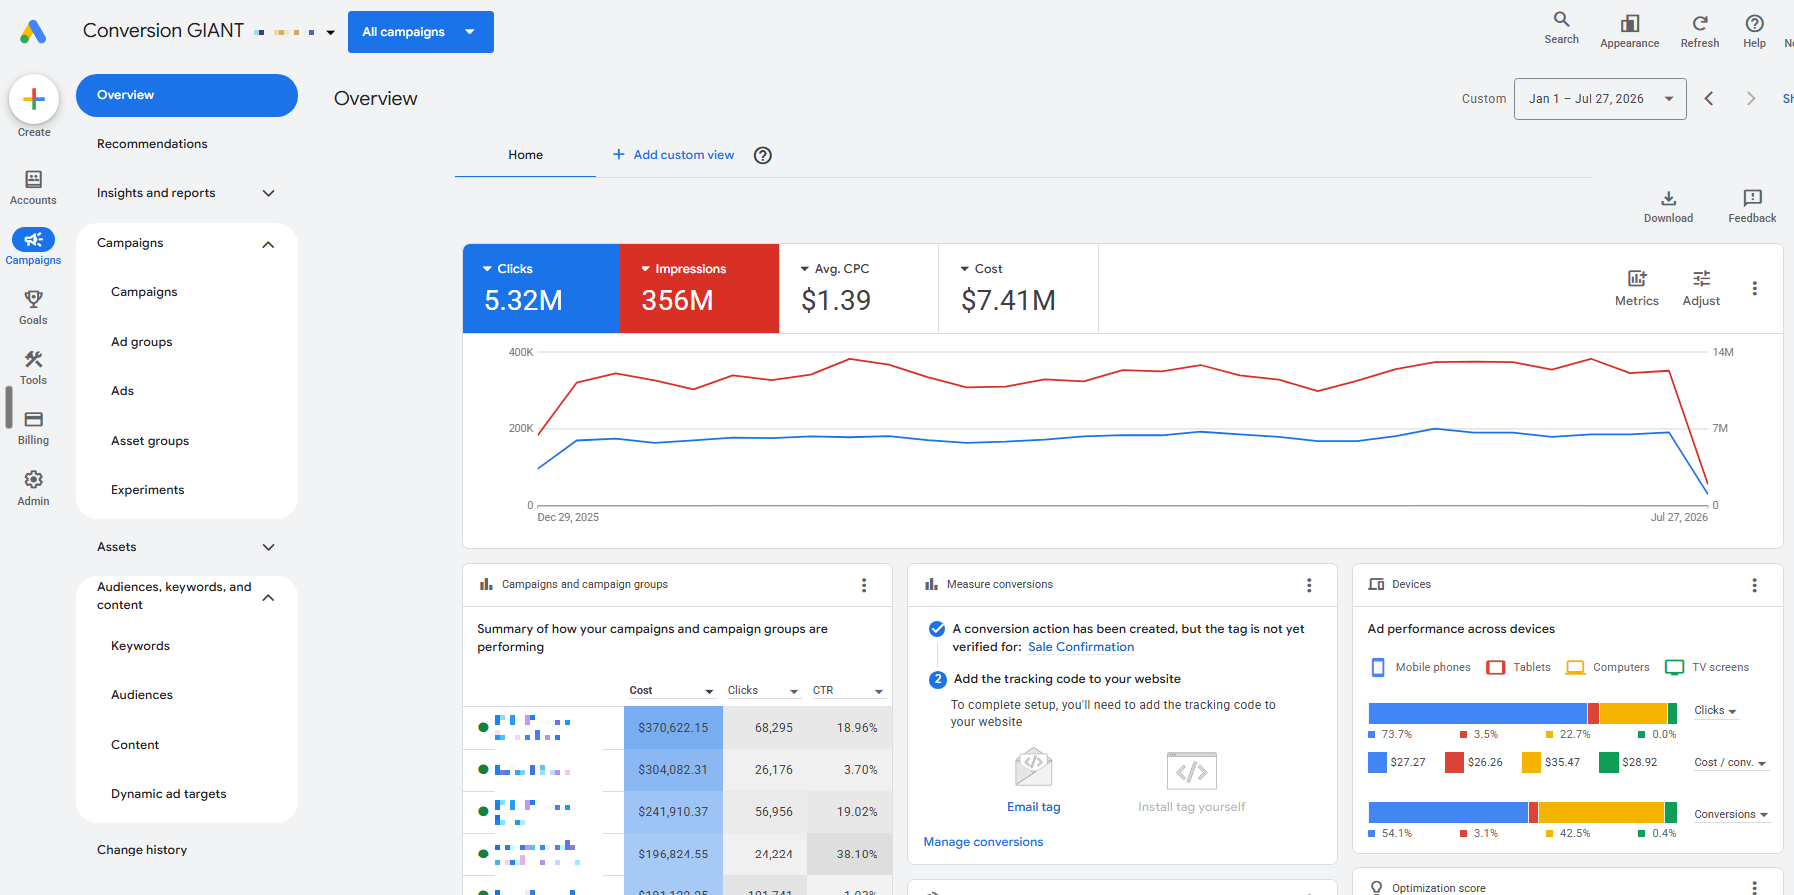
The system that separates profitable stores from stores that just spend money on ads.
This is the playbook we use inside every client engagement. It covers the four systems that actually drive ecommerce revenue and profit, along with the specific steps required to get each one working.
Most ecommerce operators treat their marketing as a collection of separate activities: ads over here, website over there, email somewhere else. That's how agencies sell it, in silos, because silos are easier to staff and bill for.
The problem is that these systems are deeply interconnected. Your product feed determines which products Google shows and to whom. Your website determines whether that traffic converts. Your automation flows determine whether one-time buyers become repeat customers. And your ad account structure determines whether you're spending money on products that actually make you money, or subsidizing the ones that don't.
Fix one without the others and you'll see small improvements. Fix all four and the compounding effect is where real profit growth comes from.
Google Ads / PMax
Campaign structure, profitability targeting, budget allocation, and bidding strategy.
Product Feed
The data layer that controls what Google shows, to whom, and how it gets presented.
Website CRO
Converting more of the traffic you're already paying for into actual buyers.
Automation & Lifecycle
Turning one-time buyers into repeat customers and building social proof that lowers costs everywhere.
18 years of ecommerce results.
18+
Years in business
$1M+
Ad spend managed per month
Premier
Google Partner status
Ad spend YTD July 27, 2026
Click to expand
★★★★★
"We've grown sales over 60% in the two and a half years we've been working with Conversion Giant. We're a lot more efficient with our advertising and creating more revenue. It's also been a relief having more time to focus on other areas of the business and letting experts handle the advertising."
Thomas Herbort / Cheap Toilet Tank Lids
★★★★★
"Conversion Giant's outstanding team of professionals communicate often and clearly the steps to increase sales while lowering costs."
John Watson / CEO, Bauhaus 2 Your House
★★★★★
"I am very impressed that we were able to drop spend by 25% and still maintain the conversions. Thank you."
Corey Searle / Home Products Inc.
★★★★★
"I wanted to say THANK YOU to you ALL!! When I reached out to Peter last summer, it was totally a last ditch effort to hopefully reconnect with the man who was my go to from day 1 with both websites. With our new customer rate being so high every month and my inability to figure out the viral thing, Google Ads has always been our source. I am happy to report that YOU GUYS are doing just what I prayed for and moving in the right direction. Thanks for being great partners!"
Shawn Witt / Auto Leather Dye
★★★★★
"Conversion Giant has taken us from throwing money in a hole to actionable data which cut our CPC in half!"
Anna Kemp / Redbarn Pet Products
★★★★★
"All three portions of our marketing efforts are increasing and have increased nonstop since we've been with Conversion Giant. Our PPC is up, our organic is up about 30% and internal links have more than quadrupled."
Billy Broadbeck / Silver Superstore
The Ecommerce Profit Protocol
Pillar One
Google Ads & PMax Optimization
Your Google Ads account is probably the largest line item in your marketing budget. It's also the one most likely to be structured around defaults and guesswork rather than actual business economics. This pillar is about rebuilding your campaign architecture around profitability: not vanity metrics, not what Google's interface suggests, and not what your last agency set up two years ago and never revisited.
Calculate your break-even ROAS before you set a single target
Every store owner has a ROAS target. Very few can explain where the number came from. In most cases, it was either inherited from a previous agency, suggested by Google's automated bidding, or chosen because it "sounded profitable."
Your actual break-even ROAS is a function of your margins. If your average gross margin is 50%, your break-even ROAS is 2.0, meaning you need to generate $2 in revenue for every $1 in ad spend just to cover the cost of goods. Anything below that and you're losing money on every sale, regardless of what the dashboard says about "conversions."
This number changes by product line, by category, and sometimes by individual SKU. A product with a 70% margin can profitably run at a 1.5 ROAS. A product with a 30% margin needs a 3.3 ROAS just to break even. Running them in the same campaign with the same target means one is subsidizing the other, and you can't see which is which.
Identify your gross margin by product category. Not your blended average, but your actual margin by category (or by individual product if your catalog is small enough). Include COGS, shipping cost to you, and any per-unit costs that scale with volume.
Calculate break-even ROAS per category. The formula: 1 / gross margin = break-even ROAS. A 50% margin means 1 / 0.50 = 2.0 ROAS to break even.
Set your profit-target ROAS above break-even. Break-even is the floor, not the goal. Your target ROAS should include the profit margin you actually want on ad-driven sales.
Audit every campaign's current ROAS against these numbers. Flag any campaign, ad group, or product group running below break-even. These are actively losing money every day they run.
Why this matters: Without knowing your break-even number, every optimization decision is disconnected from profit. You could be "improving" ROAS from 1.5 to 1.8 and celebrating while losing money the entire time.
The ROAS target trap: ROAS targets have a direct relationship with revenue volume. Set your target too high and Google will only bid on the safest, smallest sliver of traffic, giving you great efficiency but very little volume. Your ROAS looks impressive but your total profit shrinks because you're not generating enough sales. Set the target too low and you'll get more volume, but each sale costs more than it earns, so technically you're losing more money the more you sell. The profitable zone sits between these extremes, and the only way to find it is to know your actual break-even number and give the algorithm room to work above it without going to either extreme.
Segment your catalog by performance: winners, losers, and unknowns
Performance Max treats your product catalog as a single pool unless you force segmentation. Google's algorithm will naturally gravitate toward the products that convert most easily, which aren't necessarily the products that are most profitable for you.
The fix is deliberate product segmentation. Every product in your catalog falls into one of five buckets based on historical performance data.
Pull 90 to 365 days of product-level performance data. You need enough history for each product to have had a fair shot at clicks and conversions. Products with very low traffic need a longer lookback window.
Classify winners. Products with 5 or more conversions AND a ROAS at or above your profit target. These are proven, profitable, and deserve priority budget.
Classify medium-priority products. Products with 5 or more conversions that are profitable (above break-even) but below your top-tier ROAS target. They earn their keep but they're not stars.
Classify losers. Products that have had enough clicks to evaluate but can't break even. They've had their shot. Suppress them or move them to a minimal-budget campaign.
Classify watch-list products. Products showing early profitable signals (a few conversions above break-even) but not enough data to trust the pattern. Give them a dedicated campaign with controlled budget to prove themselves.
Classify the unknowns. Products that haven't received enough clicks to evaluate at all, even over a full year of data. Most catalogs have a large percentage here. They need a small, separate budget so they can surface without competing against proven winners.
Build separate PMax campaigns (or asset groups) for each tier, but only if each campaign can support enough conversion volume. Splitting products into five separate campaigns sounds clean on paper, but each campaign needs a minimum level of monthly conversions (roughly 15 to 20) for Google's bidding to function properly. If a tier doesn't have enough products or traffic to hit that threshold, combine it with an adjacent tier rather than creating a campaign that starves for data. The segmentation is only useful if each resulting campaign has enough signal for the algorithm to optimize.
Why this matters: Without segmentation, Google decides where your budget goes, and Google optimizes for conversions, not your profit margin. A $10 product that converts easily will eat your budget while a $200 product with better margins gets starved of impressions.
Fix your bidding strategy, and know when each one applies
Most stores are running the bidding strategy that was set when the campaign was created and never revisited. Google defaults to Maximize Conversions for new campaigns, which sounds right until you realize it optimizes for volume of sales with zero regard for whether those sales are profitable.
Match bidding strategy to the campaign's maturity and conversion volume. Target ROAS bidding needs sufficient conversion data to function. If a campaign gets fewer than 15 to 20 conversions per month, tROAS doesn't have enough signal and will either constrain spend too aggressively or make erratic decisions. New or thin-data campaigns often need to start on Maximize Conversions (or Maximize Conversion Value) to build up the history that makes tROAS effective. Once volume is established, switch to tROAS with a target based on your break-even math.
Set tROAS targets at the campaign level, not the account level. Your winner campaign should have a different (higher) ROAS target than your watch-list campaign. A single blanket target across the account defeats the purpose of segmentation.
Monitor for bidding strategy conflicts. Running multiple PMax campaigns in the same account can create internal competition. Watch for signs that campaigns are cannibalizing each other's traffic, particularly if a lower-tier campaign starts outbidding your priority campaign.
Why this matters: Bidding strategy is the throttle that controls how Google spends your money. The wrong strategy at the wrong time either wastes budget chasing unprofitable sales or artificially constrains growth on products that could scale.
Audit your audience signals and search theme alignment
PMax uses audience signals as directional hints for who to show your ads to. Most accounts either have no audience signals set (letting Google guess entirely) or have overly broad signals that provide no meaningful direction.
Review your current audience signals in every PMax campaign. Identify which signals are set, which are missing, and whether they actually describe your buyer. Remove generic signals that describe half the internet.
Build signals from your actual customer data. Upload customer email lists as custom segments. Add website visitor lists from Google Analytics. Layer in purchase-based audiences (past buyers, high-value buyers, repeat buyers). These give Google real behavioral data to work from.
Add search theme signals that match high-intent queries. Add search themes that reflect how your best customers actually find you, not just your product names, but the problems they're trying to solve and the comparison queries they run before buying.
Review asset group structure. Each asset group should have its own audience signals tailored to the products in that group. A single set of signals across all asset groups tells Google that all your products serve the same buyer, which is rarely true.
Review your conversion tracking setup
Everything above assumes your conversion data is accurate. In many accounts, it isn't. Duplicate conversion counting, missing enhanced conversions, incorrect attribution windows, and offline conversion gaps all distort the data that every other optimization depends on.
Check for duplicate conversion actions. Multiple conversion actions tracking the same event (purchase) will inflate your reported conversions and make ROAS look better than it is. Your account should have one primary purchase conversion action.
Verify enhanced conversions are active. As cookie-based tracking degrades, enhanced conversions use hashed first-party data to recover conversions that would otherwise be missed. If this isn't set up, your reported ROAS is almost certainly lower than reality.
Audit your attribution window. The default window may not match your actual purchase cycle. If your customers typically research for two weeks before buying, a 7-day click window is missing conversions.
Confirm revenue values are passing correctly. Check that the purchase value reported in Google Ads matches your actual order values. Mismatches here mean every ROAS calculation in the account is wrong, and so is every bidding decision Google makes based on it.
Why this matters: Bad conversion data is the silent killer. Every smart optimization built on bad data makes things worse, not better. This is the foundation check. Do it before touching anything else.
The Ecommerce Profit Protocol
Pillar Two
Product Feed Optimization
Your product feed is the data layer between your store and Google. It determines which products Google shows, for which searches, and how they're presented in Shopping results. Most stores treat the feed as a technical setup task that gets done once during onboarding and never revisited. That's a mistake. Feed quality is one of the highest-leverage inputs to PMax performance, and it's where most stores have the most untapped opportunity.
Rewrite your product titles for search intent
Google reads your product titles to decide what search queries your products are relevant for. Most stores use the manufacturer's default title, which is typically a model number or a brand name followed by a generic descriptor. That's what the manufacturer calls it internally, not what a buyer types into Google.
Title optimization is the single highest-impact feed change you can make. The difference between a default title and an intent-optimized title can mean the difference between appearing for 50 search queries and appearing for 500.
Research how buyers actually search for your products. Pull search term reports from your existing campaigns. Look at Google autocomplete suggestions. Identify the language your buyers use, including descriptors, materials, use cases, and comparison terms that matter to them.
Restructure titles to lead with the terms your buyers actually search for. Google weights the front of the title more heavily, but the right word order depends on how people search for each product. For well-known brands and models where most queries are name-specific, lead with the brand: "Merrell MOAB 3 GTX Men's Waterproof Hiking Boot" matches what that buyer is scanning for. For generic or lesser-known products where nobody searches by name, lead with category descriptors instead: "Heavy Duty Adjustable Garden Hose Spray Nozzle, Aquajet Pro X200." Your search term reports tell you which structure fits each product.
Include critical product attributes in the title. Size, color, material, pack quantity: anything a buyer would use to filter or compare. These expand the range of long-tail queries your product can appear for.
Differentiate titles across similar products. If you have 15 variations of a similar product, each title needs to be distinct enough for Google to match them to different queries. Identical or near-identical titles across variants means they're competing against each other.
Why this matters: Your product titles are effectively your keyword strategy for Shopping ads. In PMax, you can't add or exclude keywords directly. The feed is the only lever you have to influence which queries trigger your products.
Use custom labels to enable campaign segmentation
Custom labels are the five optional fields in your product feed (custom_label_0 through custom_label_4) that you can populate with any value you choose. They exist specifically to let you group products in ways that aren't captured by Google's default attributes.
This is the mechanical link between your performance segmentation (the winner/loser/watch-list bucketing from Pillar 1) and your actual campaign structure. Without custom labels, you can't split products into separate campaigns or asset groups based on profitability.
Assign a performance-tier label. Use one custom label to tag each product as a winner, medium, loser, watch, or unknown based on your segmentation analysis. This is what lets you create separate PMax campaigns by tier.
Assign a margin-tier label. Use another custom label to group products by margin range (high, medium, low). This lets you set different ROAS targets by margin tier if you're not doing it at the individual product level.
Consider seasonal or promotional labels. Tag products that are seasonal, on clearance, new arrivals, or part of a current promotion. These let you create time-bound campaigns with separate budgets and targets without restructuring your entire account.
Set up a process to keep labels current. Custom labels are only useful if they reflect current reality. Build a monthly or biweekly update process that reclassifies products as performance data changes. A product that was a loser three months ago might be a winner now.
Why this matters: Custom labels are the most underused feature in Google Merchant Center. Without them, your only segmentation options are Google's built-in categories, which don't know anything about your margins, your inventory strategy, or which products you actually want to prioritize.
Optimize product descriptions and attributes
Beyond titles, every attribute in your feed is a signal to Google about what your product is, who it's for, and which queries it should appear against. Incomplete or inaccurate attributes limit your reach and can actively hurt performance.
Fill in every available attribute. Many stores leave optional fields blank: product type, material, pattern, age group, size type, size system. Each one narrows Google's ability to match your product to relevant queries. Treat every blank field as an opportunity you're leaving unused.
Write descriptions for Google, not just for your product page. Feed descriptions can differ from your website copy. Include search terms, use cases, and comparison points that buyers care about. Keep it factual and dense with relevant attributes.
Validate your product categories. Google assigns a product category automatically, but it often gets it wrong, especially for niche or specialty products. Manually set the most specific google_product_category value for each product type. A wrong category means your product competes in the wrong auction.
Check for disapproved or limited products. Review your Merchant Center diagnostics for products with warnings, disapprovals, or limited visibility. A single feed error can suppress an entire product line without any notification in your Google Ads dashboard.
★ Super Pro Tip
Your feed descriptions and your website product descriptions don't have to match. Many stores don't realize this. Your website copy is written for humans browsing your store. Your feed description should be written for Google's matching algorithm: keyword-dense, attribute-rich, and structured around how buyers search, not how your brand wants to sound. Use the feed description field to pack in search terms, product specs, use cases, and comparison language that you'd never put on a product page because it would read terribly to a human. Google doesn't care about your brand voice. It cares about relevance signals.
Upgrade your product images
Shopping is increasingly visual. Your product image is the first thing a buyer sees in search results, and it determines whether they click before they ever read the title or see the price. Google also uses image quality as a ranking factor: poor images get suppressed in favor of competitors with better visuals.
Audit your primary images against Google's requirements. White or clean background, well-lit, product filling 75%+ of the frame, no text overlays or watermarks, no promotional badges. Products that violate these guidelines get penalized or disapproved.
Add multiple images per product. Google uses additional images in various placements: Discovery ads, YouTube, display, and PMax's visual inventory. Products with only one image have fewer placement options.
Ensure image consistency across variants. Every variant (size, color) should have its own accurate image. Showing a blue shirt with a white-shirt variant listing erodes trust and increases returns.
Consider lifestyle images for PMax asset groups. PMax can use lifestyle images (product in context, in use, on a person) for ad placements where a raw product shot would feel out of place. These perform especially well on social-style inventory like YouTube and Discover.
Build a supplemental feed for data you can't get from your platform
Your primary feed pulls directly from your ecommerce platform (Shopify, WooCommerce, BigCommerce, etc.). But your platform doesn't know everything. It doesn't know which products are your best sellers, what your margins are, what season a product belongs to, or how a product is performing in ads.
A supplemental feed lets you layer on additional data that your primary feed can't provide.
Create a supplemental feed in Google Merchant Center. This is typically a spreadsheet (Google Sheets works well) that maps additional attributes to each product ID.
Use it to populate custom labels from your performance segmentation, margin tiers, and seasonal tags. This is often the easiest way to get those labels into your feed without modifying your store's product data.
Override or enhance titles and descriptions for products where the platform's default output isn't optimized. A supplemental feed lets you rewrite individual product titles for Google without changing what shows on your website.
Keep it updated. A supplemental feed that was accurate three months ago is now actively misleading Google's bidding algorithms. Tie it to a regular update cadence, ideally the same cadence as your performance segmentation reviews.
The Ecommerce Profit Protocol
Pillar Three
Website Conversion Optimization
You're already paying for traffic. The question is how much of it you're converting, and how much is bouncing off your site because of friction, confusion, or missed trust signals. CRO isn't about redesigning your website. It's about finding the specific pages and steps where buyers drop off and fixing the reasons why.
Rebuild your product pages around how buyers actually decide
Your product page is where the buying decision happens. It's not a catalog entry. It's a sales conversation compressed into a single screen. Most product pages are organized around what the store wants to say rather than what the buyer needs to know to feel confident about a purchase.
Lead with what the product does, not what it is. Buyers care about outcomes. "Keeps your feet dry on 10-mile hikes in any weather" sells better than "waterproof hiking boot with Gore-Tex membrane," even though both describe the same product.
Structure the page in the order buyers make decisions. Hero image, then benefit headline, then key differentiators, then social proof (reviews, ratings), then specs and details, then FAQ/objection handling, then clear add-to-cart. Most stores put specs before social proof, which is backwards.
Make your primary CTA unmissable. The add-to-cart button should be visible without scrolling on both desktop and mobile, and it should stay visible as the buyer scrolls. Sticky add-to-cart bars on mobile are standard practice for a reason.
Include comparison information on the page. Buyers compare before they buy. If your page doesn't help them compare, they'll leave your site to do it elsewhere and may not come back.
Audit the mobile experience specifically. Load your top 10 product pages on a phone. Time how long it takes to find the price, the reviews, and the add-to-cart button. If any of these require more than one scroll, you're losing mobile conversions.
Build FAQ content that serves both conversion and search
FAQ sections are one of the most underused tools on product pages. Done right, they answer the exact objections that prevent a purchase and simultaneously generate long-tail search visibility. Done wrong (or not at all), those objections become reasons to bounce.
Identify the real questions your buyers have. Pull from customer service emails, chat logs, and product reviews (especially negative reviews that mention confusion or unmet expectations). These are the actual objections, not the questions you wish they'd ask.
Answer objections, not just specifications. "Can I return this if it doesn't fit?" is a conversion question. "What's the thread count?" is a spec question. Both belong in the FAQ, but the objection-handling questions do more work for conversion.
Write answers that resolve the concern completely. A vague answer ("We have a great return policy!") creates more doubt than it resolves. A specific answer ("Free returns within 30 days, no questions asked, we email you a prepaid label") removes the objection.
Structure FAQs with proper heading markup. Use question-and-answer structured data (FAQ schema) so search engines can feature your answers directly in search results.
Place FAQs below the fold but above the footer. Easy to find for buyers who scroll looking for reassurance, but not so prominent that they distract from the primary conversion path.
Why this matters: Every unanswered question is a reason to leave the page. FAQ content is the cheapest form of conversion optimization because it addresses objections without requiring any design or development work.
Reduce checkout friction to the minimum
Cart abandonment rates average 70% across ecommerce. A significant portion of that abandonment happens because the checkout process introduces friction, surprises, or complexity that kills the buying momentum.
Eliminate mandatory account creation. Offer guest checkout as the default. Account creation can be offered post-purchase, not as a barrier before the sale.
Surface total cost (including shipping and tax) as early as possible. Surprise costs at checkout are the #1 reason for cart abandonment. If you offer free shipping over a threshold, make that visible on the product page, not just in the cart.
Make shipping speed a competitive advantage. Consumers are conditioned to expect fast delivery. If you can match or beat Amazon-level shipping times, make that a prominent selling point throughout the buying process. If you can't, set clear expectations early. When a buyer can get the same product at the same price but two days sooner on Amazon, you need a reason for them to buy from you instead. That reason might be better service, a better product experience, or exclusive items, but it has to be visible before checkout, not after.
Minimize form fields. Every field is friction. Ask only for what's required to fulfill the order. Use address autocomplete to reduce typing. On mobile, use the correct input types (numeric keyboard for phone, email keyboard for email).
Show progress and security. A progress indicator tells the buyer how many steps remain. Trust badges, secure payment icons, and a visible return policy near the payment step reduce last-moment hesitation.
Split test pre-checkout upsells before assuming they help. Many stores add upsell offers during checkout because it seems like a revenue opportunity. Before committing to this, run a controlled test measuring both conversion rate and average order value with and without the upsell interruption. In many cases, removing the pre-checkout upsell actually increases total revenue because it protects the primary conversion (more on this in the Automation section).
Audit the checkout flow on mobile specifically. Load your checkout on a phone, go through the full process, and note every point where you have to zoom, scroll horizontally, dismiss a popup, or re-enter information. Each of those is a dropout risk.
Optimize page speed on landing pages
Every additional second of load time costs conversions. Google's own research shows that a page going from 1 second to 3 seconds of load time increases bounce probability by 32%. From 1 to 5 seconds, bounce probability jumps 90%.
Run your top landing pages through Google PageSpeed Insights. Focus on the mobile score. Identify the specific issues flagged: oversized images, render-blocking scripts, uncompressed files.
Compress and lazy-load images. Images are the most common speed bottleneck on ecommerce sites. Serve images in next-gen formats (WebP), compress them appropriately, and lazy-load anything below the fold.
Audit third-party scripts and defer what isn't critical. Chat widgets, analytics tools, heatmap trackers, social proof popups, loyalty program widgets: each one adds load time. Evaluate whether each tool is earning its keep relative to the speed cost. For scripts that need to stay, defer their loading so they execute after the main page content has rendered. Most third-party tools don't need to run before the page is visible, and loading them asynchronously or deferring them to after the initial page render can significantly improve perceived load time without losing any functionality.
Test real load times, not just scores. PageSpeed scores are guidelines. What matters is the actual experience a buyer has on your site. Test on a mid-range phone on a cellular connection. That's the real-world baseline.
Deploy trust signals strategically, not decoratively
Trust badges, security seals, guarantee statements, and review displays are standard on ecommerce sites. The problem is that most stores place them based on where a template puts them rather than where they'd actually influence a purchase decision.
Place social proof as close to the buy button as possible. Buyers look for validation right at the moment of decision. A star rating and review count visible next to or directly above the add-to-cart button gives confidence at the exact point where hesitation happens. Below the fold is too late. Above the hero image is too early. Right next to the action is where it counts.
Place security and guarantee signals near the payment step. Trust badges at the top of a homepage are largely ignored. The same badge next to the "Place Order" button addresses the actual anxiety the buyer is feeling at the moment of commitment.
Use specific, concrete trust language. "100% Satisfaction Guarantee" means nothing. "Free returns within 30 days, we pay shipping" means everything. Specificity is trust.
Display real-time social proof where it's credible. Recent purchase notifications, current viewer counts, and review submissions work when they're genuine. Fake or inflated social proof is worse than none. Buyers can tell, and it destroys credibility.
The Ecommerce Profit Protocol
Pillar Four
Automation & Lifecycle Flows
Acquisition gets all the attention, but the economics of ecommerce are won or lost in what happens after the first purchase. The cost of acquiring a new customer is fixed, but the revenue from that customer can multiply if your lifecycle systems are working. Most stores have the basics in place (an abandoned cart email, maybe a welcome discount), but the difference between "we have an email flow" and "our flows are engineered to maximize lifetime value" is enormous.
Build a post-purchase review collection system
Reviews are the connective tissue between your customers' experience and your acquisition costs. More reviews improve conversion rates on your product pages, improve your Google seller rating (which increases ad click-through rates), improve organic search visibility through user-generated content, and provide social proof that makes every other channel more effective.
Set the timing based on your product's experience cycle. Don't ask for a review the day a product arrives. The buyer hasn't used it yet. Ask after enough time has passed for them to form an opinion: typically 7 to 14 days for consumables and everyday products, 14 to 30 days for products that need extended use.
Make the review request frictionless. One click to rate. Option to add text but not required. The easier the ask, the higher the response rate. Don't ask for a photo upfront. Follow up with photo requests from people who left positive text reviews.
Use the right channel for the right customer. Email is standard, but SMS review requests often get significantly higher response rates for repeat customers who've opted in. Test both and use the channel with the better completion rate for each segment.
Handle negative reviews proactively. Build a response workflow: acknowledge the issue, offer to resolve it, and respond publicly. A bad review with a great brand response often builds more trust than a 5-star review.
Feed reviews back into your marketing. Pull top reviews into product page social proof sections. Use review snippets in ad creative. Include review quotes in email campaigns. Reviews aren't a standalone system. They're a content source that powers everything else.
Rebuild your abandoned cart recovery sequence
Almost every store has an abandoned cart email. Almost none of them have a thoughtfully designed recovery sequence. The difference between a single "you left something behind" email and a proper multi-step flow is significant, both in recovered revenue and in how your brand comes across.
Send the first touchpoint within 1 to 2 hours, not 24 hours. Buying intent is freshest immediately after abandonment. A quick, light reminder within the first couple of hours catches people before they've moved on.
Don't lead with a discount. Your first recovery message should remind them what they left and make it easy to return. Leading with a discount trains buyers to abandon carts on purpose and erodes your margins.
Escalate value, not discounts, across the sequence. Message 1: reminder plus easy link back. Message 2: address a likely objection (shipping, returns, sizing). Message 3: social proof (reviews from other buyers of the same product). Message 4 (if at all): a small incentive, positioned as exclusive, not desperate.
Cap the sequence at 3 to 4 messages over 5 to 7 days. More than that creates negative brand association. If they haven't recovered by the fourth message, move them to your general list.
Segment by cart value. A $30 cart and a $300 cart deserve different treatment. High-value abandoners might warrant a more personalized approach. Low-value abandoners get the standard flow.
Why this matters: A well-built abandoned cart sequence recovers 5 to 15% of abandoned carts. On a store doing $50K/month with a 70% abandonment rate, that's $1,750 to $5,250/month in recovered revenue from a system that runs on autopilot.
Engineer your welcome series to build relationship, not just sell
The welcome series is your first extended conversation with a new subscriber. Most stores use it to blast a discount and then go silent until the next promotion. That's a missed opportunity to build the kind of relationship that drives long-term value.
Email 1: Deliver on the promise immediately. Whatever they signed up for (a discount, a guide, access to something), deliver it in the first email. No teasing, no delays. Build trust by doing exactly what you said you'd do.
Email 2: Introduce who you are and why you exist. Not your "about us" page. A genuine, brief story about what makes your brand different and why someone should care.
Email 3: Educate on your best product or category. Show them what your most popular product is and why other customers love it. Include real reviews. This is a soft sell: you're helping them navigate your catalog.
Email 4: Handle the most common objection. What's the #1 reason people don't buy from you? Address it directly. If it's price, explain the value. If it's uncertainty about fit, offer your guarantee.
Email 5: Present a clear next step. By now they've seen your brand story, your best product, and your answer to their biggest concern. Give them a reason to buy now, and make it easy.
Space the sequence over 10 to 14 days. Don't send five emails in five days. Give each message room to breathe.
Move your upsells to post-purchase
Most stores put upsell offers in the checkout flow. The logic seems sound: catch them while they're buying. The problem is what it does to the original sale. A pre-checkout upsell introduces a second decision into the most fragile moment of the buying process. The buyer was ready to commit, and now they're being asked to reconsider.
The data backs this up. Studies across 1,500+ Shopify stores have found that post-purchase upsells convert at 2 to 3 times the rate of pre-purchase upsells, with typical post-purchase conversion rates of 10% to 15% versus 3% to 5% pre-purchase. The buyer has already committed, the payment is processed, and the psychological barrier to adding one more item drops dramatically.
Remove or minimize pre-checkout upsells. Let the buyer complete their purchase without interruption. The conversion you already have is worth more than the incremental revenue from an upsell that might kill it.
Place your best upsell on the thank-you page. The buyer just completed a purchase. They feel good. They're still engaged. A relevant, time-limited offer on the thank-you page converts at high rates because the commitment hurdle has already been cleared. Most major ecommerce platforms have dedicated apps built specifically for post-purchase upsells (ReConvert, AfterSell, OneClickUpsell, and others for Shopify; similar tools exist for WooCommerce and BigCommerce). These handle the mechanics so you can focus on choosing the right offer.
Build a post-purchase email upsell sequence. 2 to 3 days after purchase, recommend complementary products based on what they bought. A targeted recommendation based on their specific purchase outperforms a generic "bestsellers" list.
Choose upsell products that are complementary, not expensive. The best post-purchase upsells are items that naturally pair with what the buyer just purchased without a significant price increase. A $15 accessory for a $120 product feels like a no-brainer. A $90 add-on triggers a whole new evaluation. Test different pairings and price points to find what converts without triggering buyer hesitation.
Track the net impact, not just the upsell conversion rate. Measure whether your checkout completion rate changes when pre-checkout upsells are removed. In most cases, the increase in completed primary purchases more than offsets any lost upsell revenue.
A note on Amazon and Instacart: Many brands look at Amazon's pre-checkout upsells ("Frequently bought together," "Customers also bought") and assume they should do the same thing on their own site. The critical difference: Amazon and Instacart customers have already decided to check out. They're on the platform to buy, often multiple items, and the cart is expected to grow. On your standalone store, the buyer made one specific purchase decision and any interruption before payment risks them second-guessing that original decision. What works on a marketplace does not automatically translate to a brand's own storefront.
Segment your email list by behavior, not just demographics
Most email lists are segmented by acquisition source (if at all). Behavioral segmentation, based on what people have actually done on your site and in their purchase history, is what separates email as a revenue channel from email as a broadcast tool.
Segment by purchase frequency. First-time buyers, repeat buyers, and VIP/high-frequency buyers should receive fundamentally different messaging. A first-time buyer needs nurturing and trust. A repeat buyer needs product discovery. A VIP needs exclusivity and early access.
Segment by recency. Active buyers (purchased within 30 to 60 days), lapsing buyers (60 to 120 days), and dormant buyers (120+ days) need different re-engagement strategies.
Segment by product category or interest. If someone has only ever bought from one product category, lead with that category in your emails. Cross-category recommendations come after you've demonstrated relevance within their known interest.
Build suppression rules. Don't email people who just bought the same product you're about to promote. Don't email people mid-checkout. Don't email people who've unsubscribed from a specific category. Suppression rules prevent the "too many emails" problem that drives unsubscribes.
The Ecommerce Profit Protocol
This protocol works. Implementing it is the hard part.
If you read through this and spotted gaps in your own store, that's the point. Most ecommerce businesses have problems in all four pillars, and fixing them requires focused, coordinated work across your ads, feed, site, and email systems simultaneously.
The reality of doing this yourself
Everything in this protocol is actionable. You can take it and start working through it today. But there's a difference between knowing what needs to happen and having the time, tools, and experience to do it well.
The Google Ads restructure alone takes deep knowledge of PMax mechanics, conversion tracking setup, and the patience to build and test segmented campaigns over weeks. Feed optimization requires understanding how Google's matching algorithms read your product data. CRO changes need to be tested and measured, not just guessed at. And automation flows need to be engineered as a system, not bolted on one at a time.
Most store owners we talk to have the intelligence to understand all of this. What they don't have is the bandwidth to execute it while also running their business.
What we do (and what makes it different)
The Ecommerce Profit Protocol is the same system we execute inside every client engagement. We come in, work through all four pillars, and hand everything back in working order. Here's how it works:
90-day, done-for-you engagement. Not a retainer. Not an ongoing monthly fee. A fixed-scope project with a defined timeline and a clear handoff at the end.
All four pillars, done together. We restructure your Google Ads/PMax campaigns, optimize your product feed, fix the conversion leaks on your site, and build or rebuild your automation flows. All of it is coordinated so the improvements compound.
You own everything when we're done. The campaigns, the feed, the flows, the optimizations: all of it stays in your accounts. Nothing is locked behind proprietary tools or agency access.
No retainer lock-in. After 90 days, you decide what happens next. If you want ongoing support, we can talk about it. If you want to run it yourself with the systems we built, that works too.
Who this is for
The Ecommerce Profit Protocol is built for store owners who are:
Already running Google Ads or PMax but not confident the campaigns are structured for profit
Spending roughly $3,000 a month or more on advertising and unsure whether the return justifies the investment
Currently paying an agency a monthly retainer and wondering what they're actually doing after the first 90 days
Ready to invest in getting their marketing infrastructure right, once, rather than paying someone to babysit it indefinitely
This is not for brand-new stores, hobby projects, or businesses spending less than $1,500/month on ads. The protocol assumes you have existing traffic, existing data, and existing revenue to work with.
What a free consultation looks like
No pitch deck, no pressure, no generic advice. We'll spend 20 to 30 minutes asking about your business, your current setup, and where you're feeling stuck. We'll try to identify obvious gaps across the four pillars based on what you can share with us on the call.
If it looks like we can help, we'll have our team take a deeper look under the hood (with your permission) and get back within one business day to confirm that we can deliver meaningful results and walk you through the scope, timeline, and pricing.
If it's not a fit, we'll tell you that too, and you'll leave the call with at least a few things you can act on yourself. We'd rather be honest than waste your time.
Ready to find out what's actually broken?
Book a free consultation. We'll show you where your growth is stalling and what it takes to fix it.